

A quick upcycling project for a rainy day
- Jun 27, 2016
- 4 min read
Vintage map cabinet upcycle:
With weather that just cannot seem to settle this summer it can sometimes put you off doing any upcyling that involves a lot of paint as you are unable to use your outdoor space.
So, with this in mind I thought I would show you an upcycling project you can do indoors with out getting loads of paint everywhere or have to wait for huge quantities of your make to dry. Which lets be honest can be the most frustrating part of upcycling - you are raring to go but your make lags behind!!!
Things you will need:
- A cabinet/cupboard with raised details ( or you could add some beading yourself to the door or drawers if you prefer)
- Sandpaper
- Decoupage glue
- Decoupage brush
- Clear indoor varnish
- Small paintbrush for varnish ( with bristles that don't malt)
- Old Ordanance Survey Maps
- Any left over paint/ a sample pot of paint
- A Small paint brush
- Craft knife
- Steel rule
- Cutting mat
- Painters masking tape ( I've found frog tape to be the best)
- furniture finishing wax (optional)
Step One:

Original cabinet - a little worse for wear...
Grab a space on the floor and pop your cabinet on some newspaper just in case of any dribbles!
Make sure the cabinet is dust free, give it a wipe down if needed. If you haven't found a cabinet with the raised details you will have needed to have glued your beading onto the doors already
( using wood glue ) to create little panels you can place the maps inside of.
A quick side note on this - I think this works better with a darker wood cabinet - you can paint the shell of the cabinet another colour if you like but make sure its a darker or lighter shade to the colour you want to paint the raised panels- this makes the effect standout more - and do it a few days before this to ensure its completely dry.
Step Two:

Tape up any areas you don't want to to get paint on...
If you haven't added the raised parts yourself make sure you sand them down quickly at this point , brushing away any dust on the cabinet using a clean dry paintbrush. Get your masking tape and tape around the outside of the raised panel and if you want the inside too ( although this will be getting covered by the maps so yo don't have to) - so the raised edges are surrounded by tape and paint will not get onto any unwanted areas.
Paint all the raised parts of the panel make sure you paint all the way down to the masking tape so you can no longer see the original wood. Leave to dry. I used some left over Abigail Ahern paint in Mulberry - that I had left over from painting the walls - you could easily just use a tester pot for this.
Step Three:
Whilst these bits are drying get your cutting mat out and the maps of your choice, I think its nicer to choose a map of an area/areas that mean something to you, take look around charity shops, vintage fairs or ask older relatives if they have any. I found some my parents used to use when they took us on family holidays when where kids.
Open the map and select as many areas of the map as you have panels - my cabinet had four panels so I selected the four areas I remembered going to with my family, and that had some interesting features shown on the map ( such as a town or village or a hill ).
Placing the map completely open on the cutting mat ( so not to accidentally cut through more than one layer) cut out the areas you want using the craft knife and the steel rule ( to ensure straight edges) - having insured they are the same size as the space inside the panel. If they turn out to be a little to big when it comes to the gluing don't panic you can always use the craft knife to slice any overhang off.
Step Four:
Check the first layer of paint is touch dry ( it doesn't have to left to dry overnight as long as no paint comes off on your fingers when you touch it). Paint all the raised edges again and leave the second coat to dry.
Now, the most important bit ... go have a nice cup of tea and some cake whilst the second coat dries...

Do a panel at a time...
Step five:
Once it's all dry - coat the inside of the panel with the decoupage glue and place the first piece of map you have cut out gently on the glued panel - smoothing as you go- slide it about until it fits snugly in place. Then coat your decoupage brush with a little of the glue and paint a thin layer of glue over the top and flatten out any creases as you go - you will probably find a few creases reappear but keep flattening them as you see them. Move onto the other panels where you will need repeat the process until they all have their piece of map glued on. Leave to touch dry and add a few more layers of glue ( dependent on how well its stuck and if you need to push out anymore creases) .

It's easy to smooth creases like these out with glue & a brush- be patient this bit can take time!
Final Step:
Once its completely dry to finish the project paint a thin layer of varnish over the top of both the maps and the painted parts. It's up to you what type of inside clear varnish you want to use - but for this project I personally think a matt finish looks best.
The following is optional: If the rest of your wood hasn't been painted ( like mine) you can add a bit of furnishing wax to the exposed areas ( this isn't needed if the wood is in good nick - but mine had been through the wars a bit!)
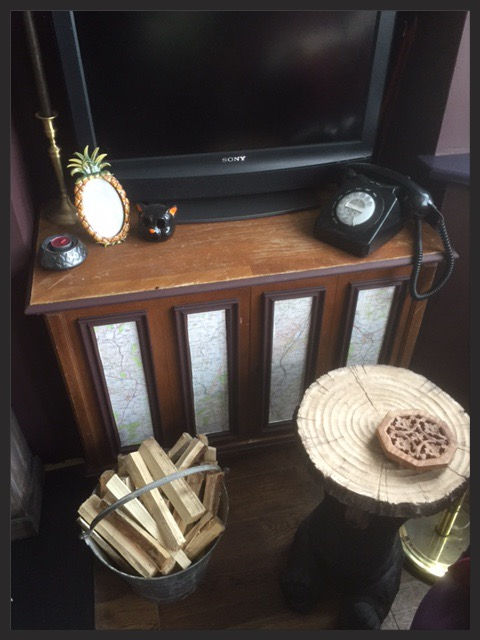
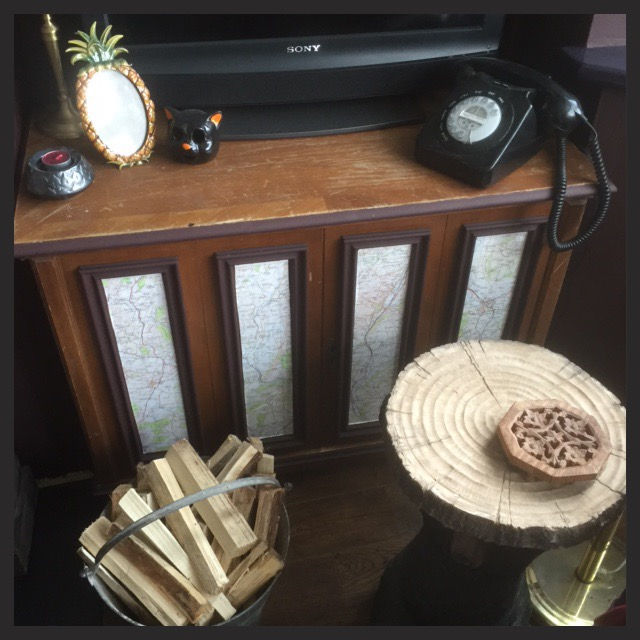
All done - sit back and enjoy your personalised vntage map cabinet.
Comments